When I first saw
Cubic Print's Filament Spool, I knew it was something that I needed to make. You can only print with air-spooled filament for a couple prints before it gets tangled and you go crazy (I would know). It's a fantastic print, but it certainly needs to be attached to something to be used to it's full potential. I had originally planned on mounting it vertically like I've seen the majority of spool holders do, but then I decided I could slim down the design by making the spool sit horizontal, just like I used to have my filament sitting. My final design files ended up under
Filament Spool Stand by Dillon1337 on Thingiverse. With 10 printed parts and less than $10 in parts, I had a very useful filament spool stand. Read on for the full scoop.
 |
| My usual 3D printing workspace |
Before I get started describing what I've done, here is a list of parts required to build this yourself:
- (1) 36" piece of 5/16"-18 threaded rod
- (37) 5/16" nuts
- (1) 5/16" end cap
- (20) 5/16" washers
- (2) 603 bearings
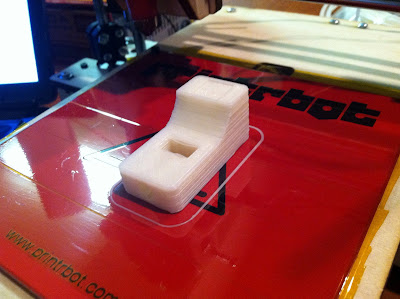
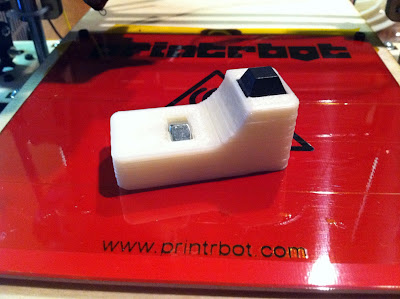
- (2) 3D-printed spool centers - original or remix
- (4) 3D-printed arms - big or small
- (4) 3D-printed feet - foot
- (4) 12.5mm stick-on rubber feet
Of course, the first thing that is needed for this build is to make the
Filament Spool by Cubic Print. As you can see from my pictures, a one-pound roll of filament easily fits on the
small spool arms from Cubic Print's thing listing. I'd reckon a one-kilogram roll would fit on as well. Although I like the design of Cubic Print's
spool center more, I chose to use the
Cubic Print filament spool remix by byteborg because I'd rather finish a print in an hour compared to three hours. Once the first spool center is printed, add a 603 bearing into the top and bottom of the center hole. It's a tight squeeze and the plastic may need to be loosened up a bit with a knife. After printing out 4 small spool arms and one spool center, I went about installing them. To install these arms, I cut four pieces of the 5/16" rod each 94.25 mm long (yeah,
very accurate) because that size fit my
air-spooled filament the best.
To install these arms (and later on, the feet), first place two nuts in the center of the cut rod. Then place a washer on the outside of each of these nuts. Begin screwing one of these rods into the holes in the arms. You may need to drill out the hole if it is
too tight, but be aware that you do want the rod to bite into the plastic as you screw it in. Once it is nearly through the plastic, plop a nut into the hole in the arm and continue screwing the rod in until it is tight. Next bring in one of the nuts and washers from the rod to lock in the arm's position. Repeat this procedure to attach the other side of the rod to the spool center and be sure that the arm is rotated 90° from the spool center and tighten. Repeat this all for the other 3 arms or feet.
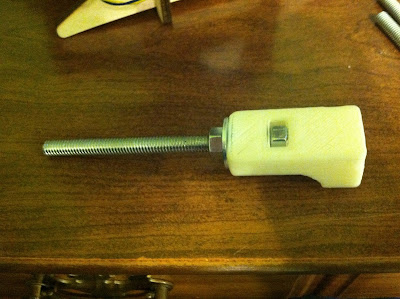 |
| Example of a half-finished foot (Arms are just the same) |
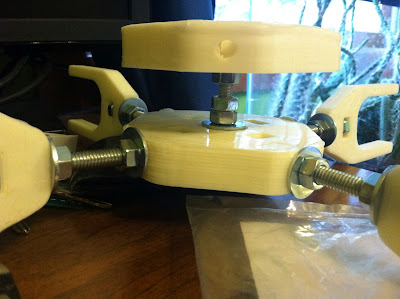
The next step is creating the center rod that will separate the arms and feet. I cut the rod to 70 mm long for my project and leaves almost no room to spare when everything is assembled. Make your own decisions when cutting this, but be sure to read the rest of this paragraph to determine what you have to incorporate onto this rod. Ensure that the feet are far enough below the arms so that they do not touch and get hung up. I used the single end cap for the top of the rod to make things look nicer, although you could use a regular nut if you're not concerned with aesthetics. Next, place a washer above and below the bearings in the top center spool and run the rod through it. I used two nuts below the center spool, acting like jam nuts, to hold the spool in place, yet being loose enough for it to rotate. Prepare the bottom center spool by using washers in the center, in place of the bearings, because the bottom will not need to rotate. Repeat what was done at the top by placing two nuts above the bottom spool, again acting as jam nuts, and one along the bottom to secure it in place. These will need to be tight enough that the bottom spool does not spin, but ensure it isn't too tight that it cracks the plastic.
 |
| Top spool center mounted with end cap, but loose enough to spin |
 |
| Two nuts acting as jam nuts in the middle |
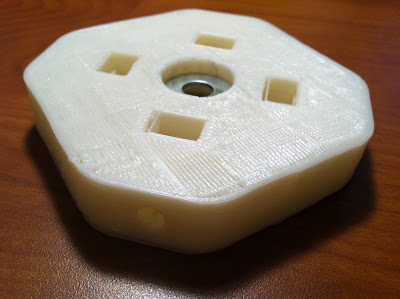 |
| Washers added instead of bearings for the bottom spool center |
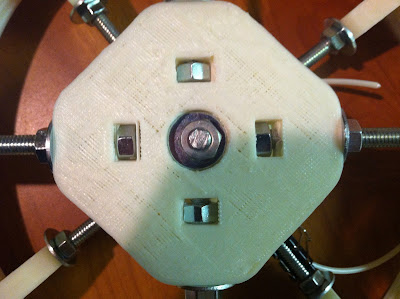 |
| One nut at the bottom to hold it all together |
I designed the feet around some 12.5 mm stick-on rubber stopper feet that I had. If you do not have these available, or cannot find them in a store, I included the
SketchUp file for the feet, so you can modify the area for the feet yourself. I cut what was remaining of my rod into four equal parts for the "legs" of this build. For me, they each turned out to be 115 mm long. Print out four feet and mount them to the bottom spool just as you did for the arms on the top spool. Ensure that the rubber feet are facing downwards.
 |
| Room for a 12.5mm rubber foot |
 |
| Rubber feet and nut added to the 3D-printed feet |
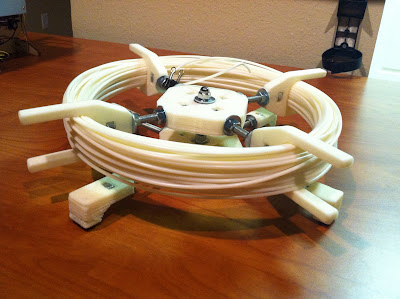
Once everything is assembled, you have yourself a free-standing filament spool that helps out very well with keeping your printer feed with filament when you're not watching. Below is a video of the spool spinning on its own and some images of the final product. There's also a bunch of other images in this project's
Picasa folder if you're interested in some more angles. If you do end up building one of these, please list that you have made on on
this project's Thingiverse page and post a picture up of it. If there's any questions with the build, do not hesitate to ask me. Good luck!
 |
| Top and holding the filament with a binder clip |
 |
| Another view of the top |
 |
| Bottom |


No comments:
Post a Comment